
Winter Sowing Resources from West Cook Wild Ones
Linda Walker and Stephanie Walquist
It’s cold and snowy out, but you can still do some gardening and prepare for spring! Plant some seeds now, set them outside, and in the spring, you will have many new plants, either for free or for the cost of a seed packet.
Linda Walker has many years of experience winter sowing different types of native plants and is generous with sharing her hard-won knowledge and experience. She ran our winter sowing workshops for several years. This post is adapted from a write-up she did for us. We hope you find it helpful.
LINDA’S HELPFUL HINTS FOR OUTDOOR WINTER SOWING:
Materials needed: Native seeds (ideally local eco-type), well-draining organic potting soil, reused plastic containers (salad mix ones work well), or seed starting flats (reusable), options: plastic baggies (reuse cereal or cheese bags), coco coir, silica sand, paint markers (or some other weather-proof way to label your flats)
- Get your seeds together that need cold moist stratification.
- Check for the lengths of time that seeds will need for stratification. Some seeds in the legume family need to be scarified and then stratified for 10 days. Some will need 30 days. Most need 60 days. A few may need 90 days. Know the time, so you can plan when to plant your seeds. Getting started in January is usually a good month to get start winter sowing (plus what a great way to ring in the new year) before April hits with warmer temps.
- Seeds that need double-dormancy won’t germinate from one winter of stratification.
- Prairie Moon Nursery is essential to check for germination codes (these tell you what the seeds need in order to germinate).
- The plastic container you use as your ‘mini greenhouse’ needs to be clear only on the top, but it must be at least 2″ deep. Clamshell types from fruits & veggies are ideal.
- Mark the containers on both top & bottom with a permanent pen. Paint pen markings seem to last the longest. It’s a good idea to label in several places on the container in case of sun fading. I have also used masking tape in the past, which can make it easier to see the names of the seeds.
- Make 1/4″ holes in the top & bottom, 2”’ apart with a knife, drill, or heated screwdriver.
- Use a good well-draining potting soil, but do not use a seeding medium for it’s too light for outdoor use. Soil needs to be pre-moistened before you use it to fill your container (moist enough that you don’t need to water from atop before putting it outside).
- Fill the soil close to the top, then press lightly. It will settle over the winter. Add more to “top off.”
- Place or sprinkle seeds. Sprinkle a cover layer of soil over the seeds.
-
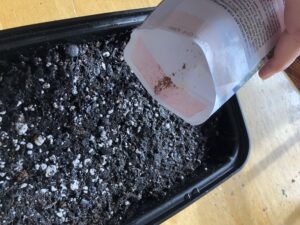
Sprinkling seeds on pre-moistened soil. Depending on species, a light layer will be placed, or the seeds will pressed into the soil. If “surface sowing” is indicated, do not cover but press firmly into the surface to make good seed-to-soil contact.
- Close the container & do a happy dance. 🙂
- Position the containers outdoors in a place safe from high winds & shovels. This is usually best close to a house or garage, but with no overhang. Seeds must be exposed to all weather conditions.
- Bid all adieu… till you meet again in the spring. Mother nature takes over from here. However, it’s still a good idea to check in on containers weekly at minimum to ensure covers haven’t blown off or other issues like that. It’s also a good idea to monitor the moisture of the soil to ensure it’s moist enough especially when we have drier conditions in winter.
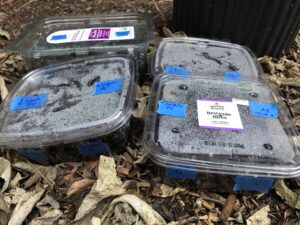
Containers labeled and placed outdoors where they are protected but still exposed to wintery conditions. - When you begin to see seedlings, you should start to remove the cover gradually. Eventually, when the seedlings are too tall for the cover, remove it completely.
- Monitor the containers for watering. You may also need to move the container if your seedlings are getting too much sun for their recommended sun conditions. If the weather turns suddenly very cold, it’s a good idea to make sure they have some protection temporarily.

Blue Flag seedlings grown outside - Once it’s time for planting, you can plant them where you’d like them. Mark them because they will likely stay fairly small the first year, and you may need to give them extra attention by watering and weeding them. Some seedlings may get chewed down, so paper collars can be helpful.
- Some people will grow their seedlings in individual containers for a few more months depending on the species.
- It can take some plants 2-3 years before they get to flowering size, but think about how gratifying it will be to know that you shepherded a little seed into that beautiful, life-giving plant!
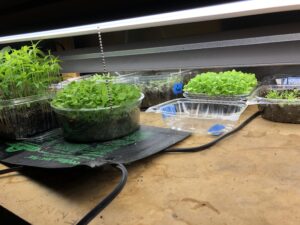
Multiple species winter sown but brought indoors to get a head start on growing.
Have fun! Share your excess plants with friends.
If you’d like to get your plants going a little earlier after your seeds have done their required stratification, you can bring them indoors and grow them under lights. See our post for more information: Indoor Seed Starting
We also have a recorded video from Jan Gricus’s workshop she did for us:
Other methods for artificial cold-moist stratification:
If you’d like to save space and/or have more control over the process, you can use the below two methods.
Soil in a baggie: For small seeds, this is an ideal method. Prairie Moon recommends sand, but we’ve used regular potting soil, and it has worked.
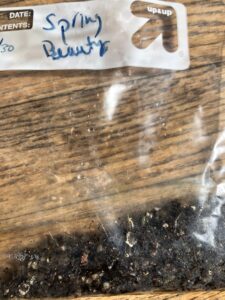
- Label a baggie with your seed name, date started and end date for stratification.
- Moisten the soil in a bowl
- Mix in seed.
- Place mixture in your prepared baggie.
- Place in the refrigerator.
- Mark your calendar to remind yourself.
- Check on the mix regularly to make sure it’s still moist or that seeds may have germinated early.
- Once you’ve stratified for the required length, you can place your soil mix on top of a container filled with soil, and treat as you would for any annual seeds.
- You can place them under lights
Paper towel method: Also saves space and gives you control over the process. Best for larger seeds.
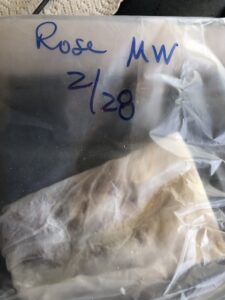
- Label a baggie with your seed name, date started, and end date for stratification.
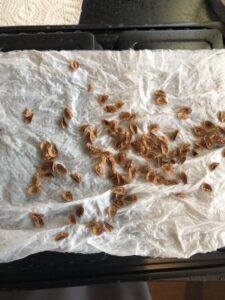 Moisten a paper towel.
- Place seeds on the towel.
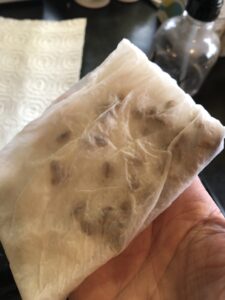
- Gently fold towel over the seeds.
- Place in prepared baggie.
- Place in refrigerator. Check regularly and remoisten towel.
- Sometimes mold might grow. Simply rinse seeds and place in a new moistened paper towel. Replace in baggie.
- If seeds are germinating, go ahead and plant them.
- Once you’ve stratified for the required length, you can place your soil mix on top of a container filled with soil, and treat as you would for any annual seeds.
- If it’s warm enough outside (May in the Chicago area), you can plant outside, but make sure to gently water the area and keep an eye on them.
Some other resources:
Stratification Guide from Prairie Moon Nursery: How to Germinate Native Seeds
Prairie Moon stratification strategies with photos: Indoor Stratification
Feel free to email us with any questions: [email protected]