
Guide to Native Gardening
There are many ways to start using native plants in your garden. You can start to incorporate native plants into your existing landscape, or you can start completely from scratch.
Step 1: Observe, Plan
First, make an assessment of the environmental conditions (shady or sunny, drainage, soil types, irrigation, etc.). This assessment is a critical one. It it extremely important you know exactly how many hours of sun the area gets. The sun can feel quite strong in an area for an hour or two, but it may not shine strongly for the 6+ hours many prairie plants need for best development. If you put plants that need shade in a full sun situation, they will not survive.
It is also helpful when creating a naturalistic landscape design to consider the associations found in specific plant communities (a prairie, wetland or forest). You may also want to visit some local natural areas to observe these associations first-hand.
Planning and planting a native garden does not have to be done all at once. It can be installed in phases as your budget and time allows.
Step 2: Soil/Garden Bed Preparation
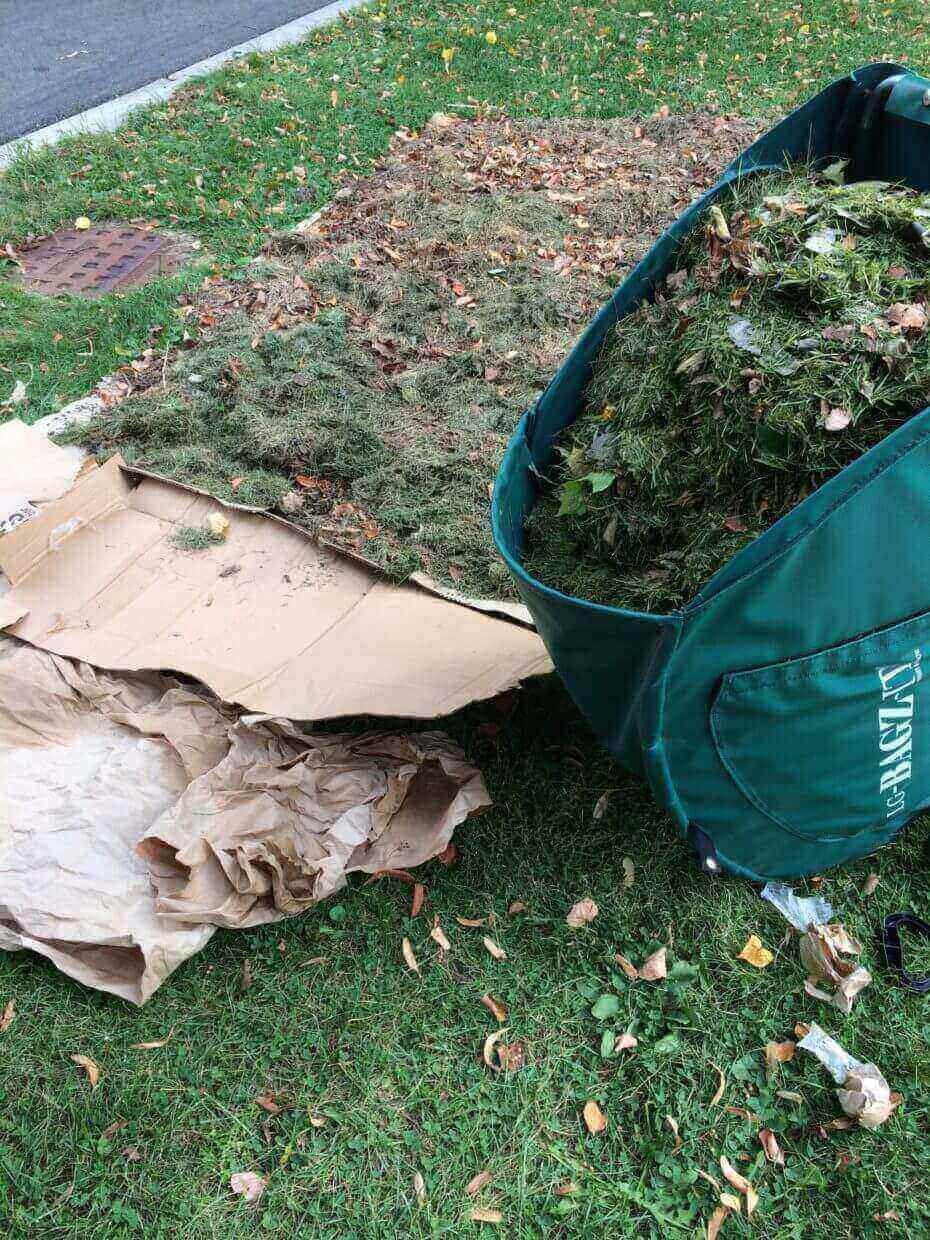
The easiest method to start a new garden is to use sheet composting or to make a lasagne bed, which is simply layering browns and greens on a bed of cardboard, in the fall. There is no digging or tilling which is destructive to the soil food web.
First, make sure you have mown the area. Place down cardboard and wet it thoroughly. Then place a layer of leaves, then a layer of greens (lawn clippings are great), and so on till you have a pretty thick bed. Water these layers. Add a layer of mulch on top. Over the fall, winter, and spring, all of the decomposers in the soil will be working and by late spring you can plant into your new garden. All of the ingredients may not be thoroughly composted, but they are usually enough so that you can plant. As the temps warm up, soil organisms will consumer materials and turn them into soil soon enough.
You can also make an immediate bed at any time during the season with cardboard and soil placed on top as long as you are using seedlings (roots are not so deep), and the soil is thick enough. No need to cut holes through the cardboard. Keep the seedlings watered, and the cardboard will soften and be consumed by the decomposers fairly quickly.
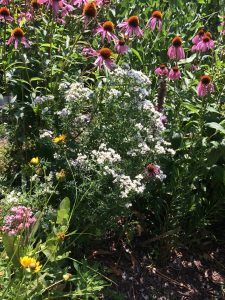
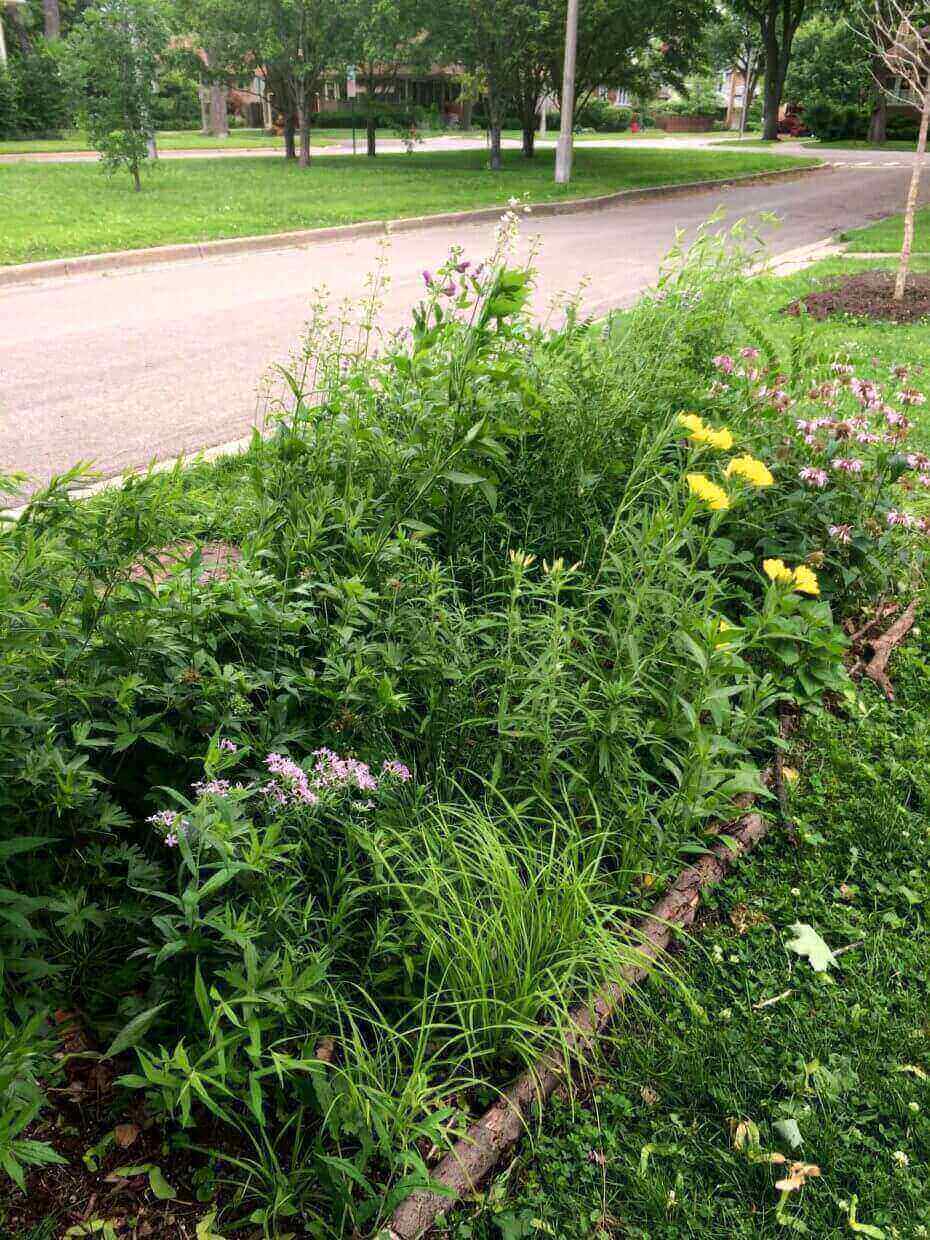
Pictures below show the success of the lasagne bed method. You can see the cardboard and paper placed on top of the lawn, and the layering of browns and greens in Fall of 2014. Seedlings were planted in Spring of 2015. Garden is fairly mature in Spring 2016 and Fall 2016 in photos below.

If you are making a new bed in an area that is lawn, you can either use the lasagne bed method or dig up grass (or hire someone with a sod cutter). You can then plant directly into the new bed. Be sure to use the plant labels (or make your own) to help you identify your plants until you can recognize them. Be sure to mulch in order to suppress weeds, conserve moisture, and feed soil microorganisms. Pull or clip unwanted plants (“weeds”) before they get too large or set seed. Clipping the “weeds” helps you avoid disturbing root systems of young plants nearby. If you pull them when they are young, simply leave them on the top of the bed, roots up, and they will decompose quickly, returning the nutrients back to the soil.
Step 3: Plant Selection and Plants
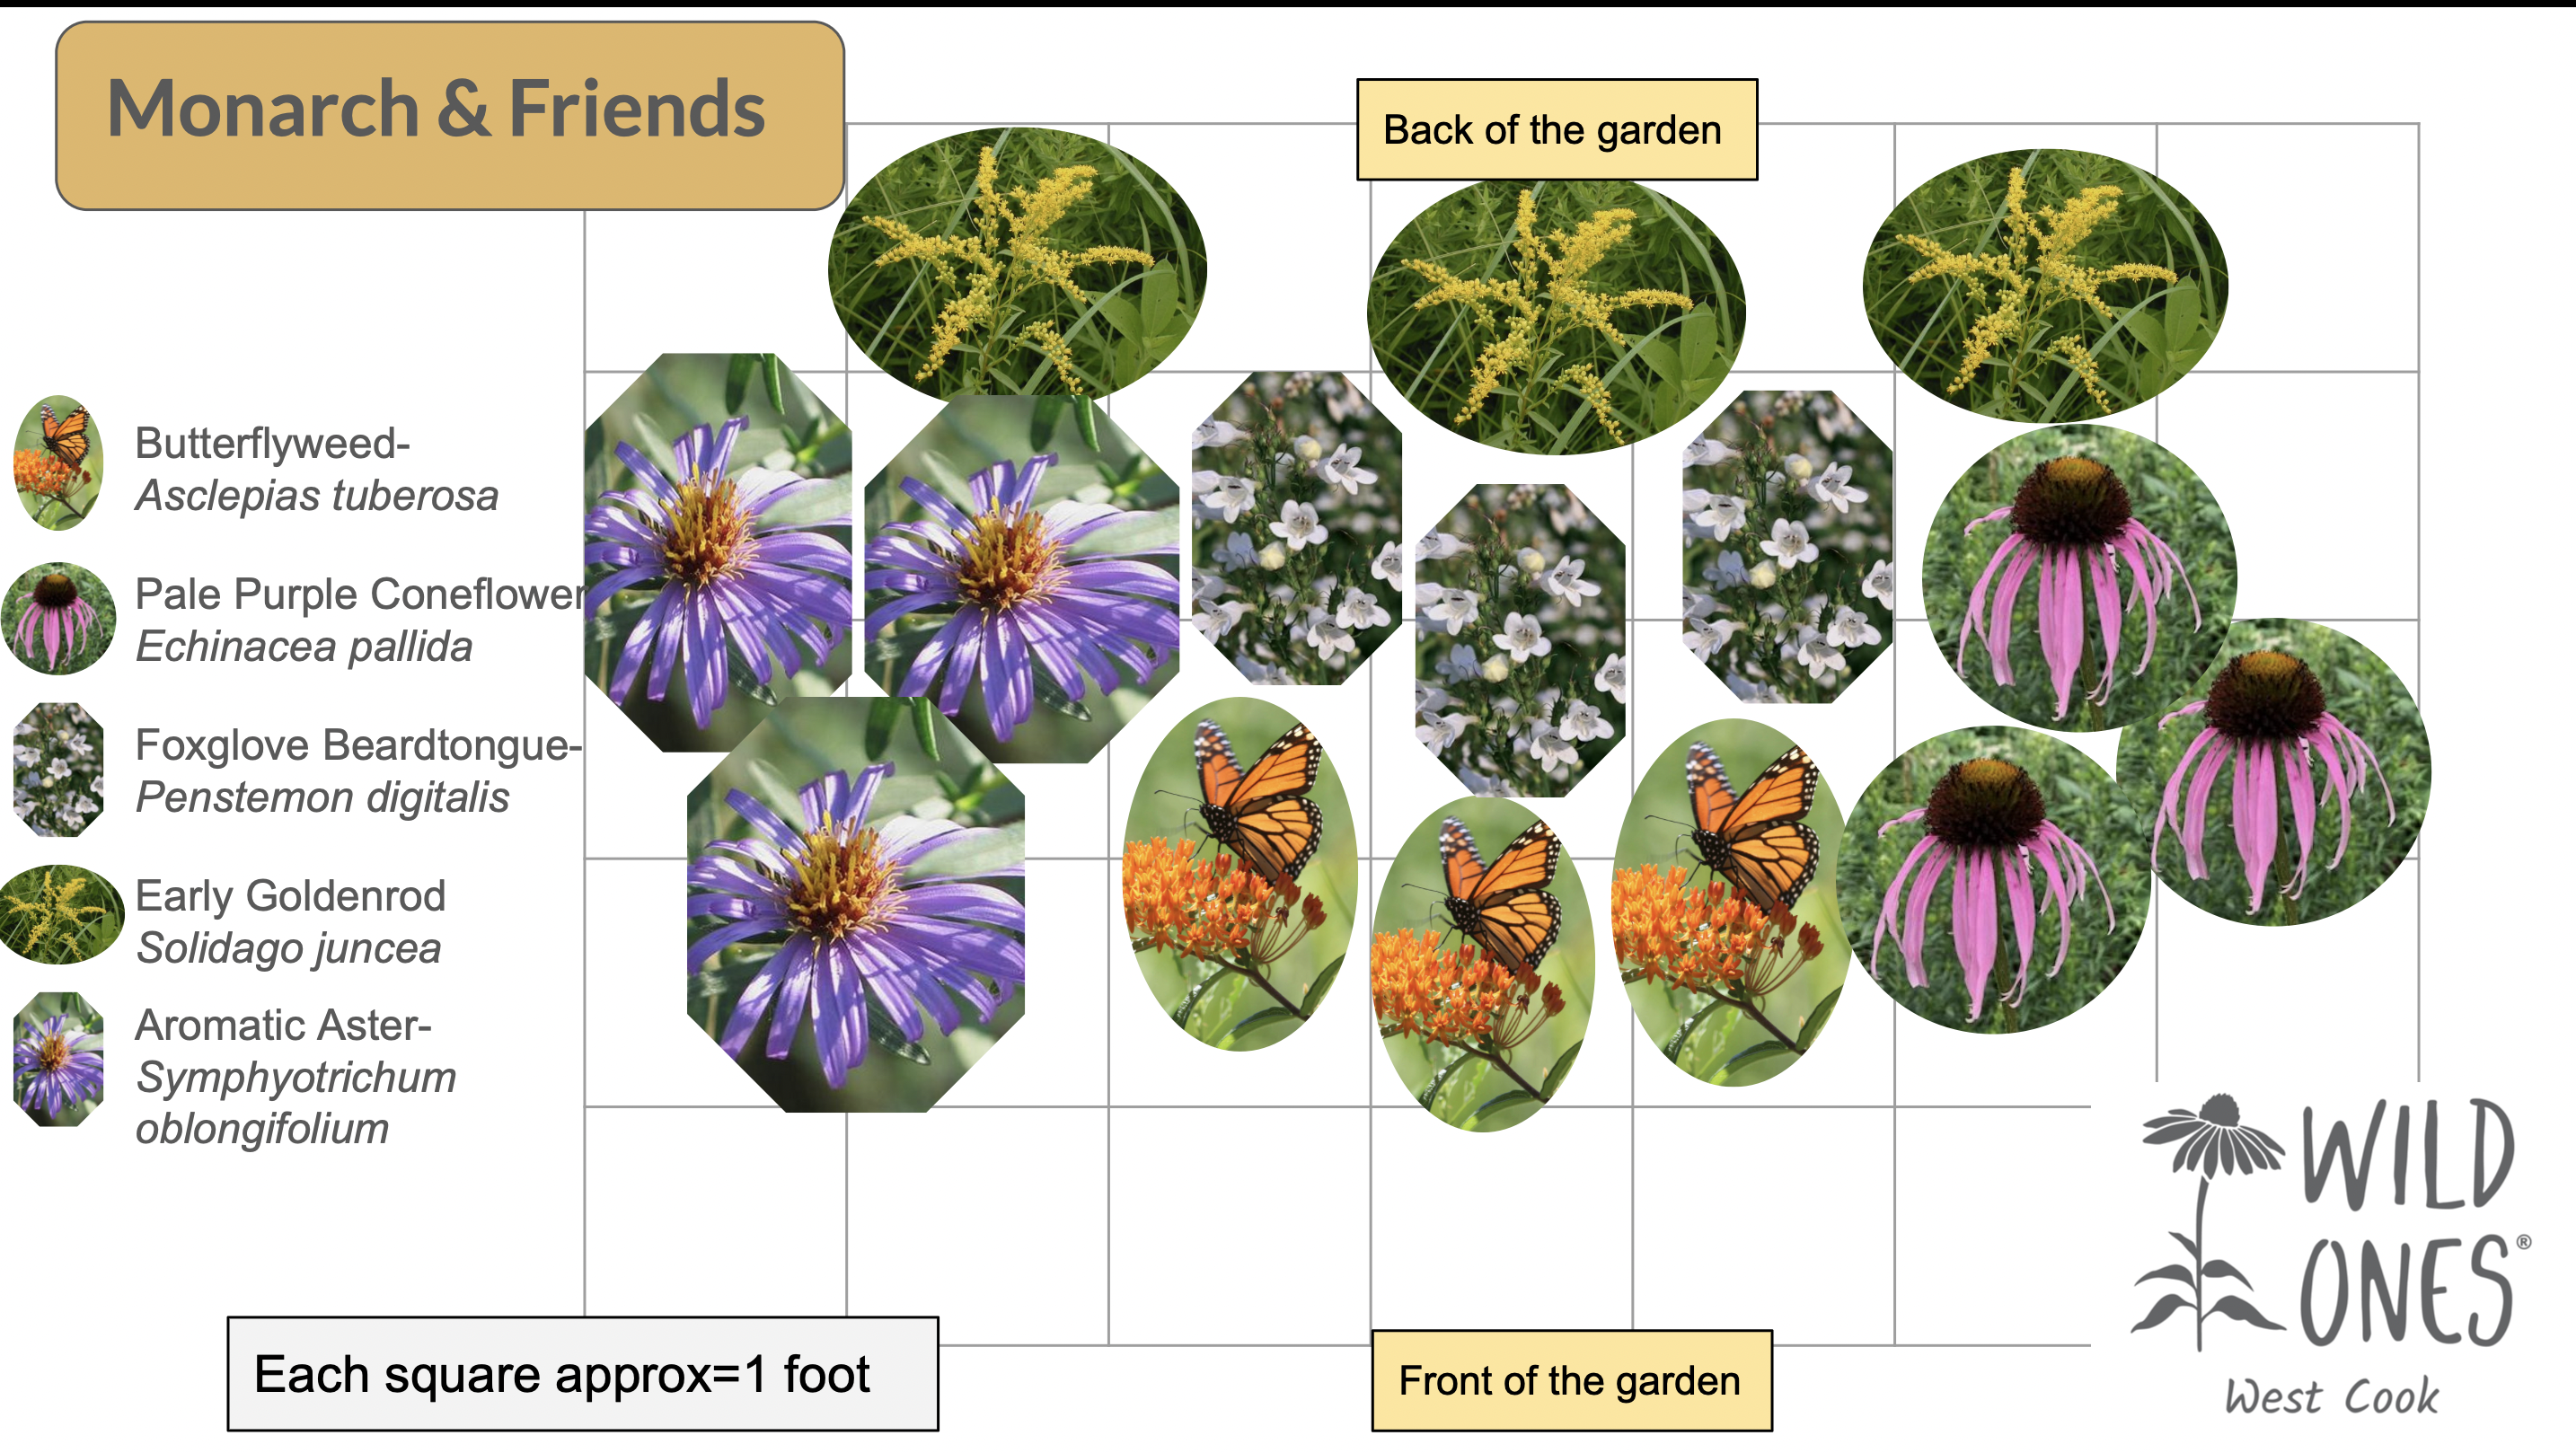
Choose species based on the soil, light, and water conditions of your site and for the size, shape, texture, and color you desire. Below are just a few of our favorites.
Suggested Prairie Plants (full sun):
Spring:
Spiderwort, Golden Alexanders, Prairie Smoke, Prairie Phlox, Cream Prairie Indigo, Shooting Stars, Penstemon digitalis
Summer:
Purple Prairie Clover, Purple Coneflower, Black-eyed Susan, Butterflyweed, Culver’s Root, Rose Milkweed
Fall:
New England Aster, Smooth Blue Aster, Stiff Goldenrod, Showy Goldenrod, Aromatic Aster
Grasses:
Little bluestem, Big Bluestem, Prairie Dropseed, Indian grass, Switch Grass, Purple Love Grass
Suggested Woodland Plants (shade):
Spring:
Wild geranium, Virginia Bluebells, Wild Columbine, Celandine Poppy, Jacob’s Ladder, Early Meadow Rue, Virginia Water Leaf, Wild Blue Phlox, Hepatica
Ferns:
Marginal Shield fern, Ostrich Fern, Christmas Fern
Groundcovers:
Wild Ginger, May Apple, Allegheny Foam Flower
Three-Season Plants:
Solomon’s Seal, Solomon’s Plume, White Baneberry
Fall:
Short’s Aster, Large-leaf Aster, Elm-leaved Goldenrod, Zig-zag Goldenrod, Blue-stemmed Goldenrod, Blue Mist, White Snakeroot (can be a prolific self-seeder, grows smaller in shady situations)
Shrubs:
Hazelnut, Witch Hazel, Arrowwood Viburnum, Pagoda Dogwood
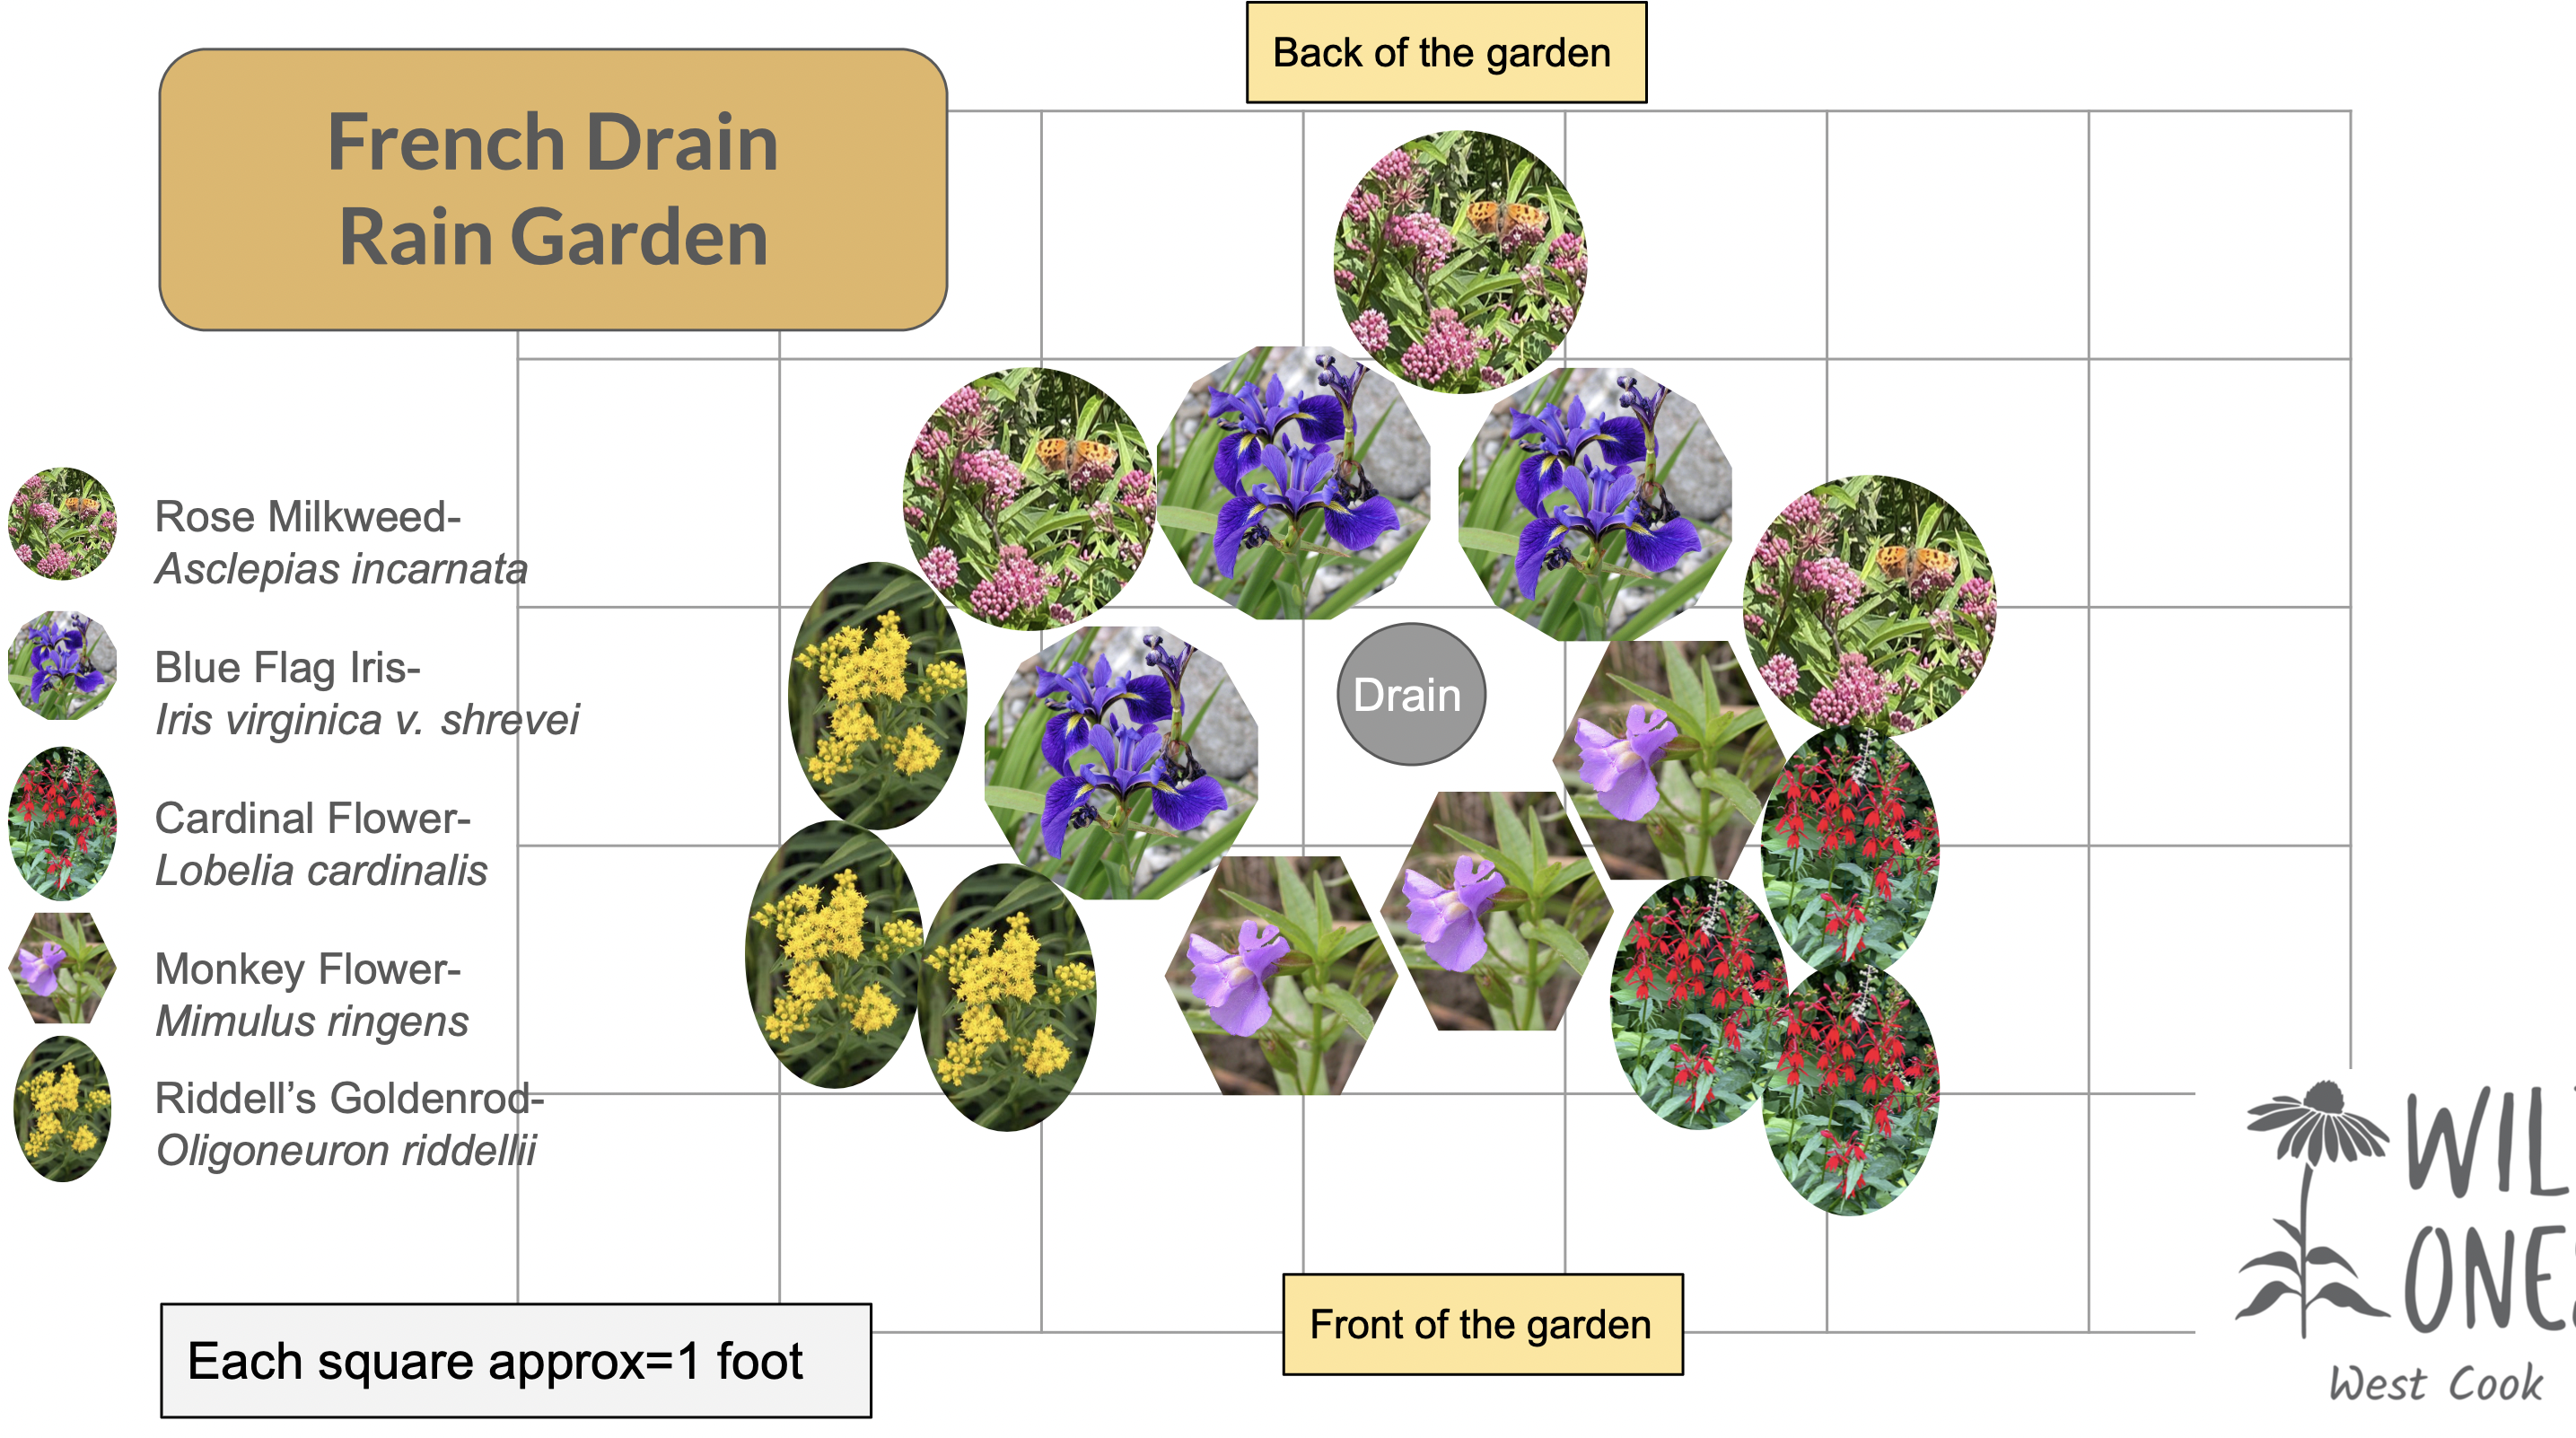
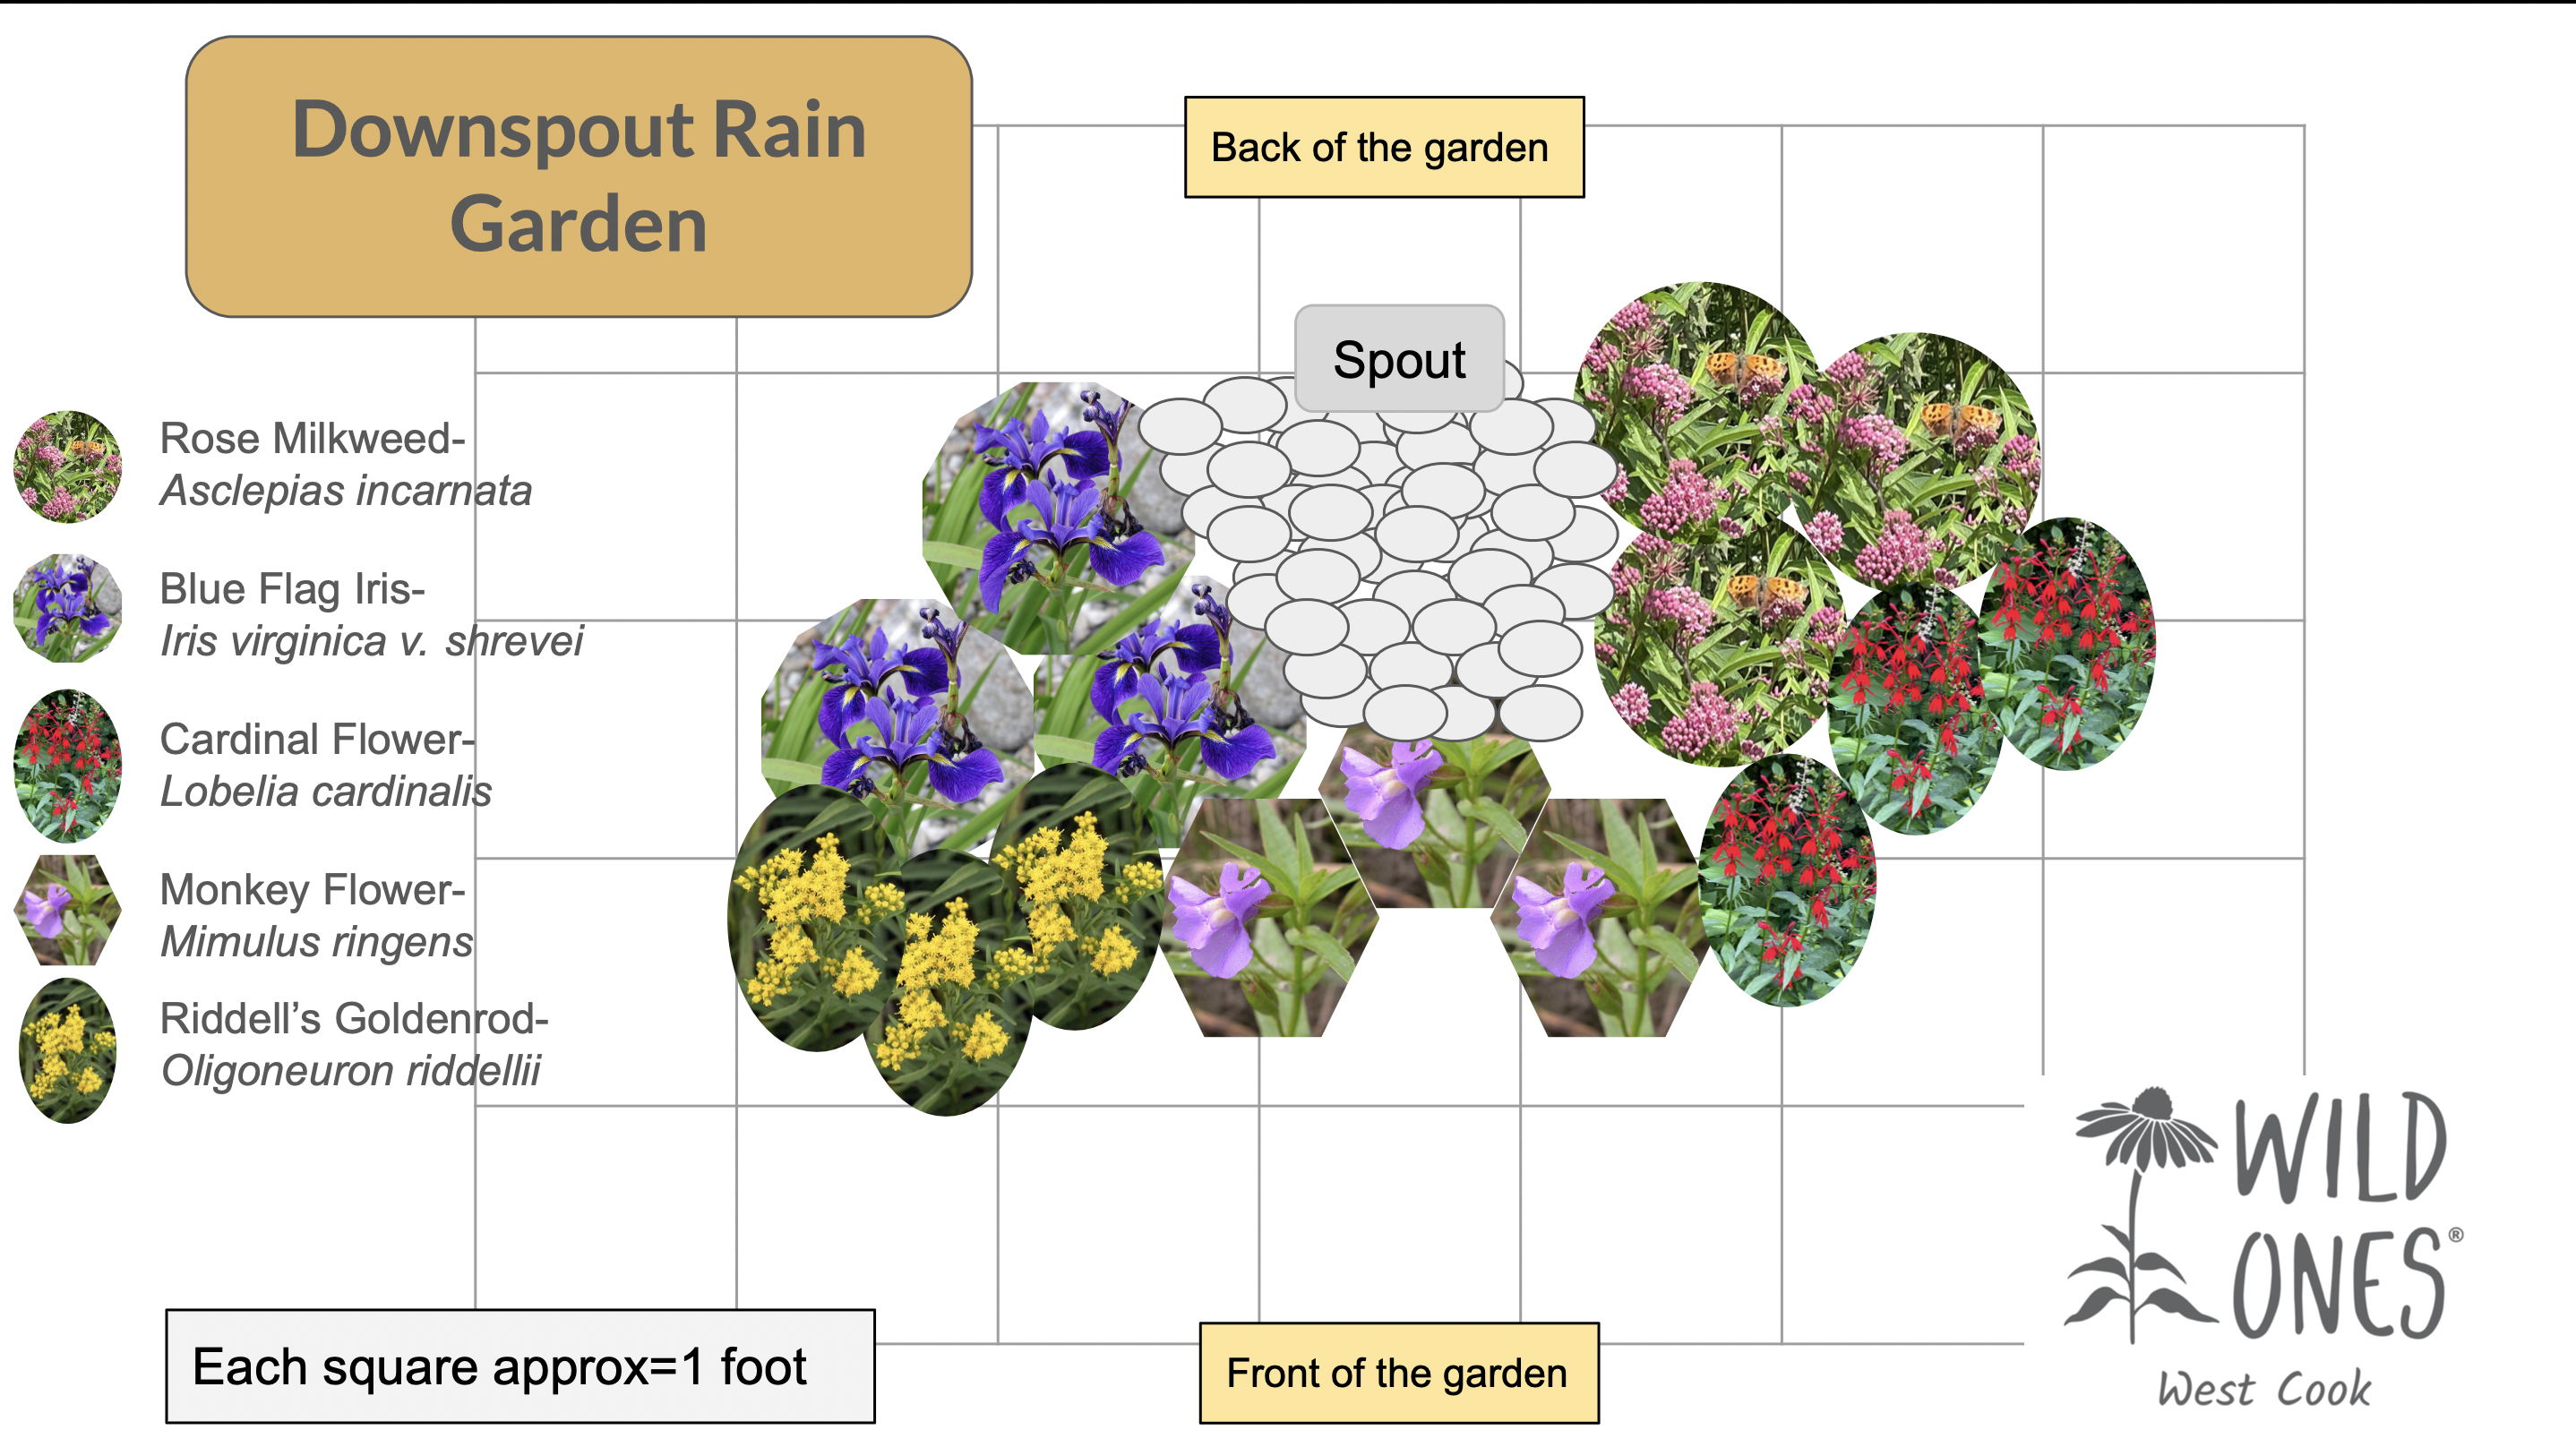
Sample Planting Plans: These plans were originally created for our garden kits. You can repeat the patterns for a larger area or add plants of your own choosing. We also recommend adding grasses like Prairie Dropseed or Little Bluestem for sunny gardens. Long-beaked Sedge for part-sun or shady conditions. There are many types of Carex for different sun and soil conditions.
Step 4: Maintaining Your Landscape
Watering during establishment critical
Your native plants will need time to become established. The critical period for watering and weeding is two to three weeks after planting or longer if you are planting in warm, dry seasons. Even if the plants are labelled as drought-tolerant, they are NOT able to go without frequent watering in the beginning after they are transplanted. They will die.
Importance of mulching
If you are planting trees or shrubs, apply a four to six-inch layer of organic mulch around them (but, not touching the main stem) and a one-inch or less mulch layer for perennials. Mulch can help control weeds, reduce temperature fluctuations, help retain moisture and give a finished look to the landscape. Native plants usually do not require fertilizer. Many thrive in poor soil and applying fertilizer could chemically burn them, or stimulate either lush or spindly, weak foliage growth with few flowers.
The only “fertilizer” you will need
Leaving the organic matter in the fall and spring is all you need to do to have healthy plants. This material will feed the soil organisms which will then feed your plants. Fungi are critically important for the health of your plants, and they prefer whole material to consume. Fungi deliver nutrients AND water to your plants.
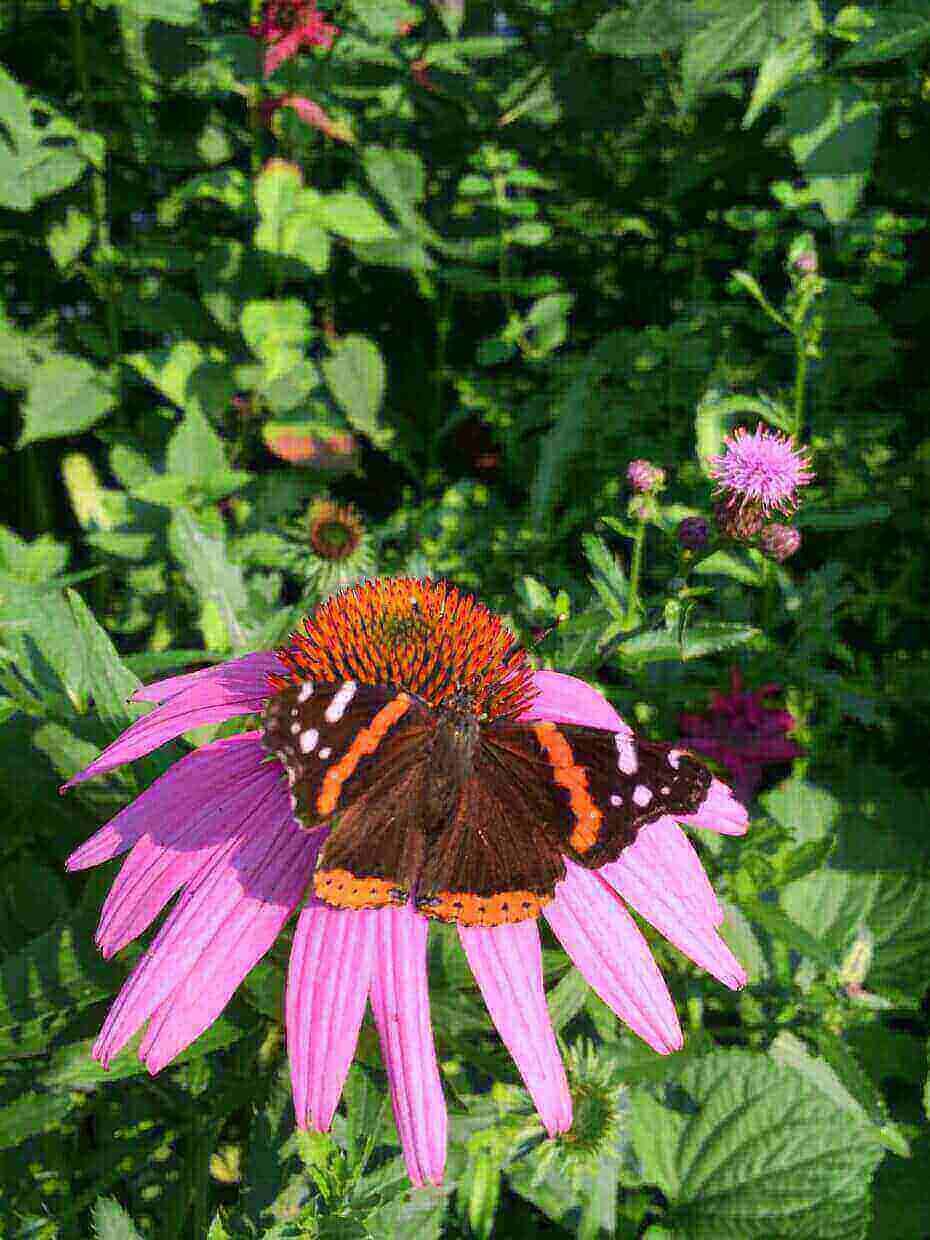
Enjoy the butterflies and birds that visit. Each year add more native plants. Make more prairie and/or woodland spaces. Educate your neighborhood by example! Once you get started, it becomes easier and easier every year to maintain your property/grounds — less mowing and watering; more wildlife and soil improvement.
To read further about native plant landscaping, check out this Penn State Extension article. It discusses misconceptions about native plants.